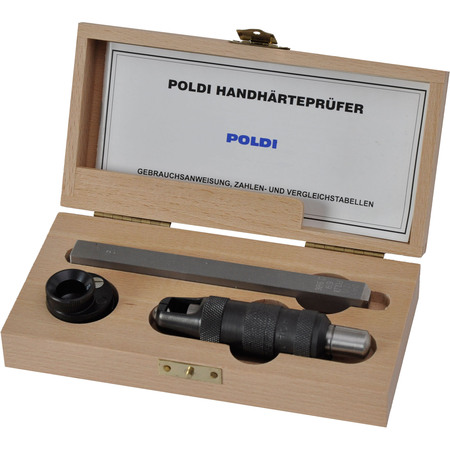

Poldi Impact Hardness Tester enables to perform the impact test with the help of a hammer at workplaces, in workshops, at assembly sites or any other places. Brinell hardness and tensile strength can be seen in tables.
The test made with the Poldi hardness tester shall be performed in the following way:
Directions for use:
Quenched steel ball with the diameter of 10 mm shall be put between the piece tested and calibrated steel bar of a defined tensile strength (check test piece). A single strong hammer stroke shall create ball impressions into the check test piece and the piece tested at the same time. Diameters of both impresions have to be measured carefully with a magnifier provided with the tester. Based on the values measured, Brinell hardness and tensile strength of the piece tested can be found in the table. If a measuring microscope is available, diameters of impressions can be taken more precisely.
When the common Poldihardness tester uses the check test piece made of steel having the strength of 70 kg/mm2 , the deviation of the tensile strength converted from the Brinell hardness compared to the real tensile strength in case of steel having the strength of 50-100 kg/mm2 is maximum ± 3 %, in case of milder types of iron and steel and steel having the strength of 100-150 kg/mm2 (e.g. with hardened, heat treated and high alloyed steels) it is maximum ± 5 %. With the stength of 150 – 200 kg/mm2 , inaccuracy may be, under certain conditions, even a little higher.
Poldi hardness tester, as well as Brinell hardness tester, may be used for all forgeable iron and steel types with the exception of austenitic steels, e.g. steel with 25 % Ni, steel with 14 % Mn, corrosion- resistant Cr-Ni steel, non-magnetic steel, etc.
Each calibrated steel piece can be used for about 40 tests.


| When the common POLDI hardness tester uses the check test piece made of steel having the strength of 70 kg/mm², the deviation of the tensile strength converted from the Brinelll hardness compared to the real tensile strength in case of steel having the strength of 50-100 kg/mm² is maximum + 3 °/o , in case of milder types of iron and steel and steel having the strength of 100-150 kg/mm² (e.g. with hardened, heat treated and high alloyed steels) it is maximum + 5 °/o. With the stength of 150 - 200 kg/mm², inaccuracy may be, under certain conditions, even a little higher. |
- Wooden case
- Standard bar
- Magnifying glass
- Hardness conversion table
- Different standard bars


