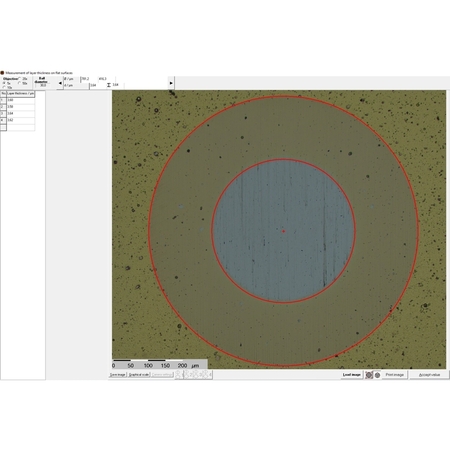

- Measuring of the layer thickness (Single layer and layer systems)
- Determination of wear coefficients
- Measuring of calottes on flat and cylindric surfaces
- Projectmanagement and documentation
kaloSOFT is a computer-assisted video evaluation system for the determination of layer thickness and wear resistance.
By means of kalosoft, layer thickness and wear coefficient can be determined simply with a few mouse clicks. The calculation, storage and administration of data is easy and comfortable. Several series of measurements are summarized in a project and can be managed easily.
For measuring the layer thickness of coatings or layer systems, a small spherical cap is grounded into the layer down to the base material by means of the kaloMAX cap grinder. On flat surfaces, the outline of the cap is circular. On cylindrical surfaces, it is elliptical. The layer thickness can be calculated from the difference of the cap diameter at the surface of the sample and the diameter of the boundary between layer and base material. These diameters can be measured with a microscope. The diameter of the grinding ball, which goes into the calculation, is known. This purely geometrical method for the determination of layer thickness can be extended to layer systems.
For the abrasive wear characterization of materials and layers, the high-precision wear resistance tester kaloMAX NT is used in combination with the kaloSOFT program.
The wear crater should be ground into the layer without breaking through to the base material. The width and depth of the wear crater has to be measured by means of a surface profiler or a microscope.
The wear coefficient specific to the abrasion slurry can be determined from the volume of the wear crater, the bearing strength and the grinding path. The volume of the wear crater can be calculated from the diameter of the grinding ball and the depth or the diameter of the wear crater.
Note: Please notice that the display of the camera image is bound to the associated camera.


- Software onCD-ROM
- Manual
- Firewire-Camera
- PC (ready-to-use)
- Incident light microscope


