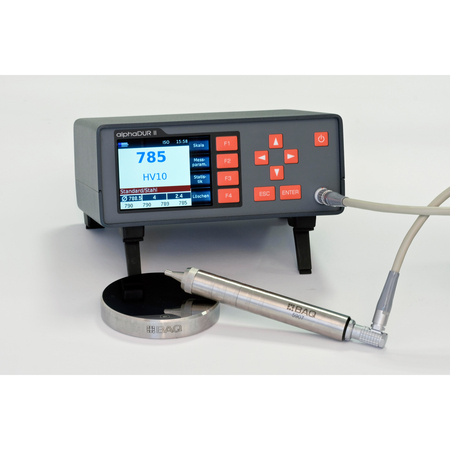

- Fast and easy hardness testing
- Clear user interface with function keys
- Measuring method according to DIN 50159 and ASTM A1038
- Robust metal casing
- Individual material calibrations
- Extensive storage and statistical functions
- Applicable for automated measurements
The alphaDUR II has proved it‘s worth as a reliable and versatile hardness tester since many years. It can be employed from simple manual measurements to fully automated production testing.
The operation of the alphaDUR II is very easy because all information is shown on the large display. Hardness scale and material can quickly be changed by context-sensitive function keys.
Due to the UCI measuring method measurements can be done fast and accurate. The measured value is displayed directly after the test load has been applied. A test load between 0.3 (HV 0.3) and 10 kg (HV 10) can be chosen depending on the application and the sample surface.
More Information for the selection of an propper probe are available in our application support documents.


| Measuring prodcedure | Modified Vickers hardness according to the UCI testing procedure, with Vickers diamond 136° according to DIN 50159, ASTM A 1038-05 and VDI/VDE Guidelines 2616. The Measuring of the intendation is done under test load. |
| Test load | 10, 20, 30, 49 or 98 N, depending on the UCI probe |
| Testing materials | Preferably metals, material calibrations can be saved in the device. Testings on glass, ceramic and plastic are possible if reference measurements for calibration are performed. Minimum thickness for steel: approx. 5 mm |
| Hardness scale | HRC, HV, HB, HRB and tensile strength |
| Display | 3,5“colour LCD 320 x 240 pixels |
| Data memory | 32MB Flash memory for approx. 512,000 data records with changeable classification in groups. Storage of date, time and GOOD/BAD rating |
| Statistics | Average value, minimum, maximum, standard deviation absolute and relative |
| Interface | USB-Slave for connection to the PC, 2x USB-Master, 100Base-TX (Ethernet), RS-232 |
| Power supply / battery charge | 100 - 240 V AC NiMH-Battery: 4,8 V / 2700 mAh |
| Operating hours | Battery life approx. 7 h, Loadingtime approx. 3 h |
| Languages | German, English, Russian |
| Temperature range | Operation: 0°C to 50°C, Storage: -20°C to 70°C |
| Dimensions | 198 x 160 x 78 mm (H/W/D) / Probe: Ø 19,5 mm, Length175 mm |
| Weight | Device 1400 g, Probe 190 g |
- Basic device with built-in battery
- UCI probe (3N, 10N, 20N, 30N, 49N or 98N)
- SPS-Interface
- Connection cable Device <-> Probe
- Power supply/Battery charger
- Calibration certificate
- Manual
- Case


